Why Ductless AC Installation is Revolutionizing Home Comfort
Ductless ac installation offers an energy-efficient way to cool and heat your home without traditional ductwork. Here’s a quick overview:
Key Benefits:
- 30% more efficient than conventional central air systems
- Zoned temperature control for individual rooms
- Easy installation with just a small wall hole needed
- Cost range: $700-$2,000 for DIY kits, $2,000-$10,500 professionally installed
Basic Installation Steps:
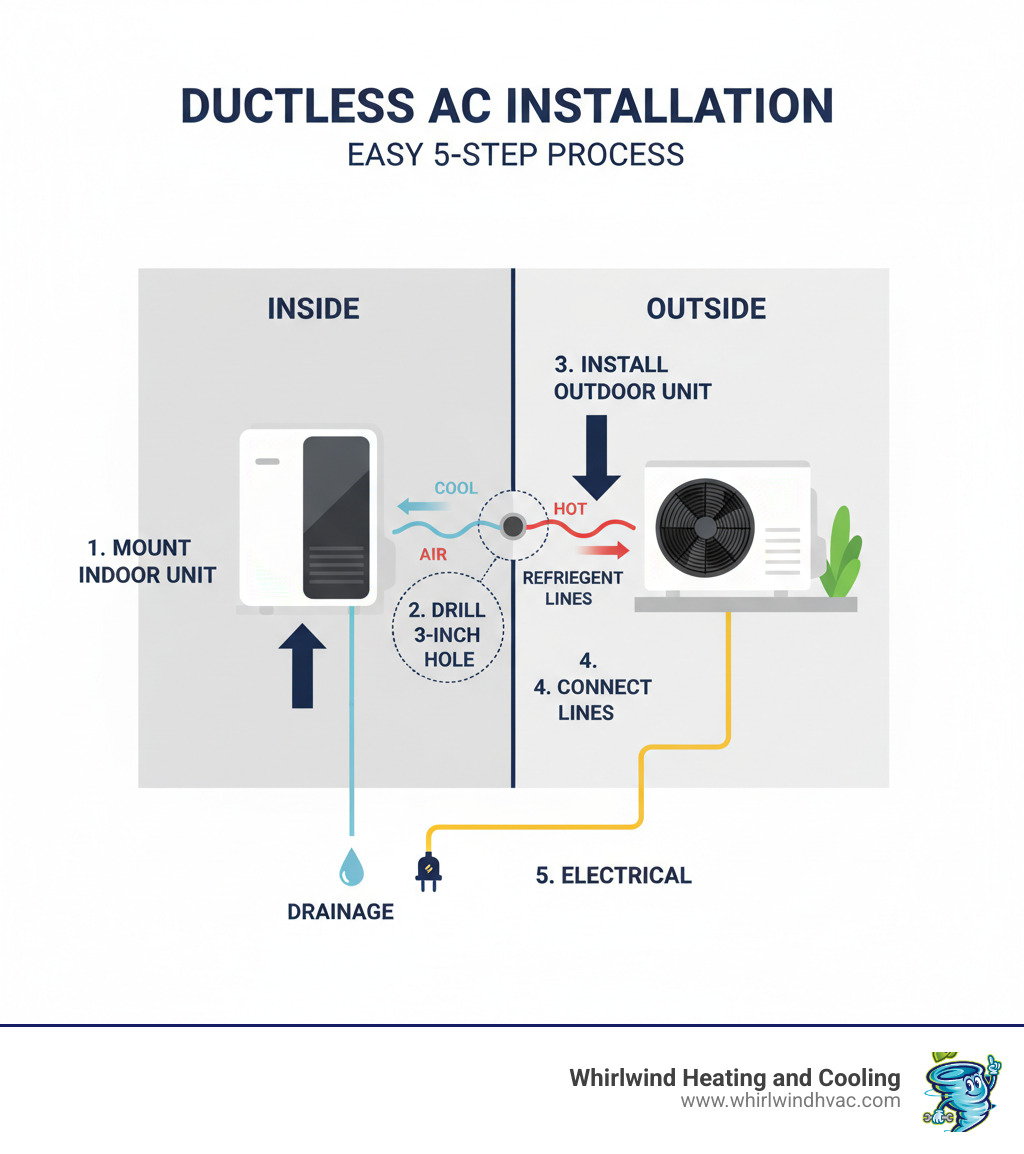
- Mount indoor unit bracket on an exterior wall.
- Drill a 3-inch hole for refrigerant lines.
- Install the outdoor condenser unit.
- Connect pre-charged refrigerant lines.
- Complete electrical connections.
Ductless mini-split systems allow you to control each room’s temperature separately while using up to 50% less energy than older systems. Instead of cooling your entire house to make one room comfortable, you cool only the spaces you’re using.
Modern DIY-friendly systems with pre-charged refrigerant lines make installation manageable for handy homeowners. Whether you’re cooling a hot room, adding comfort to a garage, or replacing an old system, ductless offers a flexible and efficient solution.
Pre-Installation: Sizing, Costs, and System Fundamentals
Before starting your ductless ac installation, it’s crucial to understand the system and choose the right size for your needs.
How Mini-Splits Work
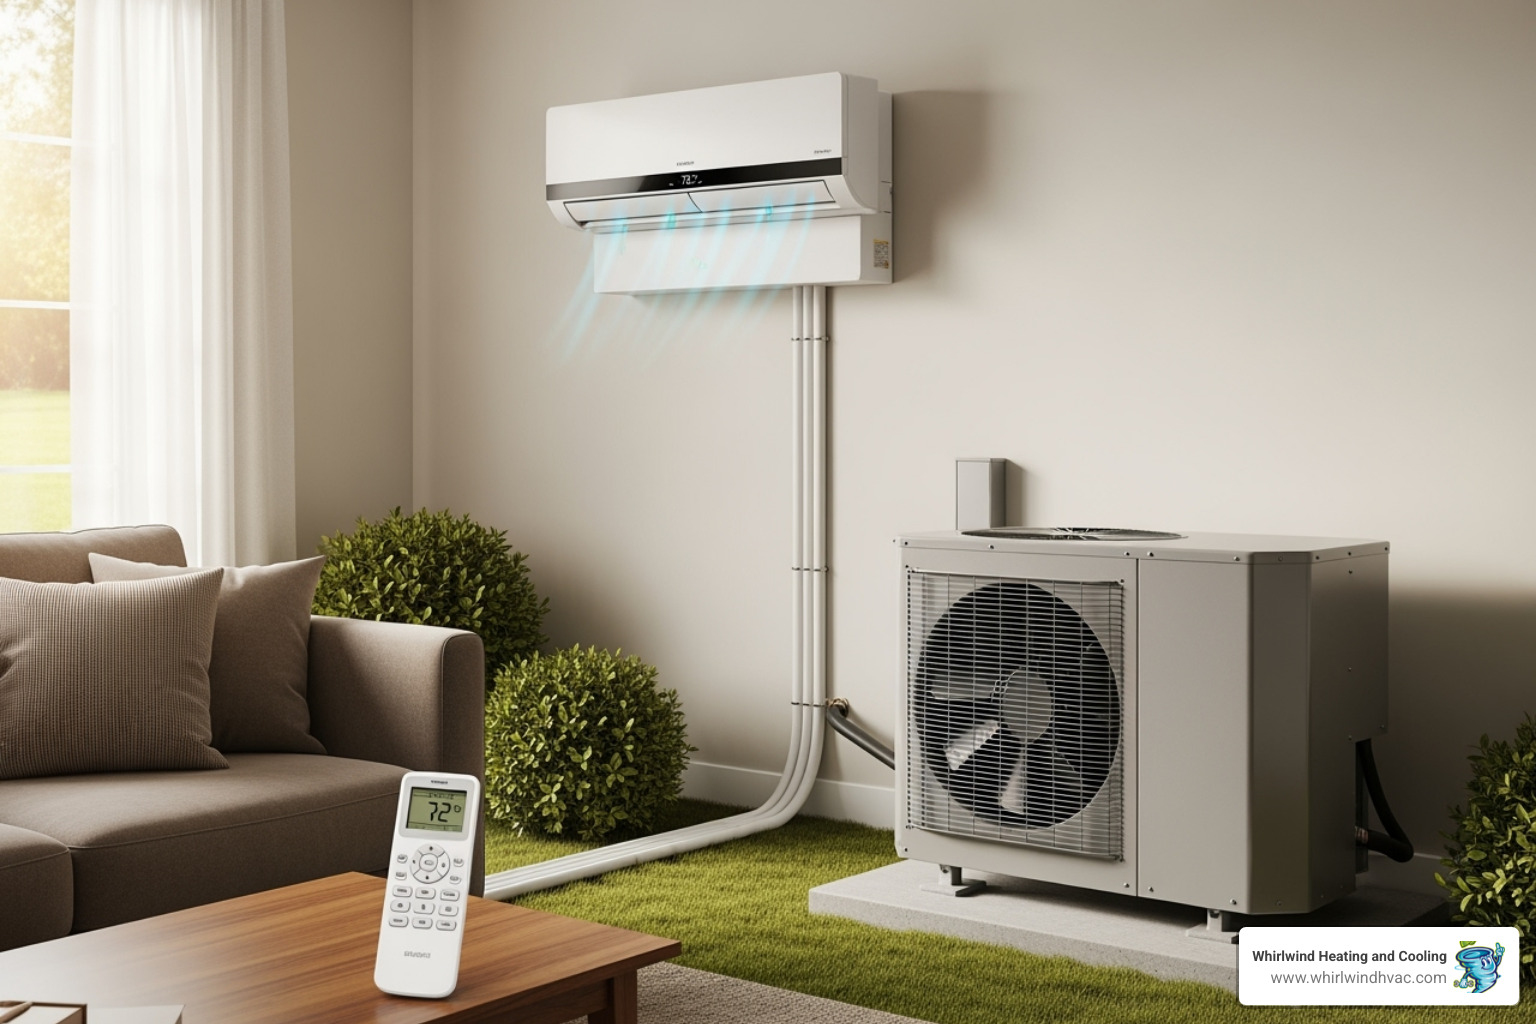
Ductless systems have two main parts: an outdoor compressor and one or more indoor units connected by a small conduit. The indoor unit pulls in warm air, and refrigerant absorbs the heat. This heated refrigerant travels to the outdoor unit, which releases the heat outside. Most modern systems are heat pumps, meaning they can reverse this process in winter to bring heat into your home.
This design eliminates the 30% energy loss common in systems with leaky ductwork. For more details, see the U.S. Department of Energy’s guide on Ductless Mini-Split Air Conditioners.
Sizing Your Unit
Proper sizing is critical. An undersized unit will struggle to cool, while an oversized unit will cycle inefficiently. Capacity is measured in British Thermal Units (BTUs). A 12,000 BTU unit might cool 1,500 square feet, but you must also consider:
- Insulation quality
- Number and type of windows
- Your local climate zone
- Ceiling height
- Heat-generating appliances
Energy Efficiency: SEER Ratings Explained
SEER (and the newer SEER2) ratings are like a car’s MPG—higher numbers mean better efficiency and lower operating costs. As of 2023, new systems require a minimum SEER2 rating of 15. Modern ductless systems often range from 17 to 42, with anything 17 or higher considered excellent. High SEER2 ratings amplify the inherent efficiency of ductless systems, leading to significant monthly savings. Many customers are amazed by the Ductless Mini-Splits Systems Benefits when their first energy bill arrives.
Cost Breakdown: DIY vs. Professional Installation
- DIY systems cost $700 to $2,000 for the unit. Budget extra for tools and materials like a condenser pad and line set cover.
- Professional installation ranges from $2,000 to $10,500. In the Willamette Valley, a quality installation typically costs $3,000 to $6,000. This price includes expertise, specialized tools, and crucial warranty protection.
Ductless Mini-Splits vs. Central AC: A Quick Comparison
| Feature | Ductless Mini-Splits | Traditional Central AC |
|---|---|---|
| Cost | Lower unit cost (DIY); moderate professional | Higher unit cost; expensive ductwork |
| Efficiency | 30%+ more efficient; zoned control | Moderate; up to 30% duct losses |
| Installation | Small wall hole; no ductwork disruption | Major ductwork installation required |
| Flexibility | Individual room control and zoning | Whole-home; limited zone options |
| Noise Level | Whisper-quiet indoors | Can be noisy; outdoor unit noise |
| Ideal For | Room additions, older homes, targeted comfort | Whole-home with existing ducts |
The bottom line: Ductless ac installation offers superior flexibility and efficiency, especially for homes without existing ductwork.
Gearing Up: Tools and Materials for a DIY Install
For a successful DIY ductless ac installation, proper preparation is key. Having the right tools and materials ready will make the process much smoother.
Safety First!
- Electrical Safety: Always shut off power at the breaker before working on wiring. If you are not comfortable with electrical work, call a licensed electrician.
- Ladder Safety: Ensure your ladder is stable. For extended work, consider using scaffolding.
- Personal Protective Equipment (PPE): Wear safety glasses, work gloves, and sturdy shoes to protect yourself from injury.
Essential Tools for Ductless AC Installation
Some of these tools can be rented if you don’t own them.
- Drill with a hole saw (typically 2⅜-inch) for the wall penetration.
- Level to ensure the indoor unit is straight for proper drainage.
- Stud finder to locate secure mounting points.
- Torque wrench for tightening refrigerant line connections to exact specifications.
- Flaring tool to create perfect seals on copper lines.
- Vacuum pump and manifold gauge set to remove air and moisture from the lines.
- Leak detector to find any leaks before charging the system.
- Basic hand tools like wrenches, measuring tape, and tubing cutters.
Materials Required
- Condenser pad or wall bracket for a stable, level base for the outdoor unit.
- Line set cover kit to protect the lines from weather and for a clean, professional look.
- Electrical wire (e.g., 14 AWG, 4-conductor cable) for connecting the units.
- Disconnect box for safe power shutoff near the outdoor unit.
- Exterior-grade sealant to seal the wall penetration.
- PVC pipe to use as a protective sleeve through the wall.
- Stainless steel screws and straps for rust resistance.
- Refrigerant oil (like Nylog) to help create leak-free seals.
The Step-by-Step Ductless AC Installation Process
Let’s walk through the ductless ac installation process. Modern DIY kits with pre-charged lines have made this more accessible, but using a vacuum pump is still recommended for non-quick-connect lines to ensure proper system evacuation.
Installing the Indoor Unit
- Choose the Location: Mount the unit on an exterior wall for easier line routing. Select a spot with good airflow, away from direct sunlight, and with at least 6 inches of clearance from the ceiling and 6 feet from the floor.
- Mount the Bracket: Use a stud finder to secure the mounting plate to at least two studs. If studs aren’t available, use heavy-duty wall anchors. The bracket must be perfectly level for proper drainage.
- Drill the Conduit Hole: Drill a 2- to 3-inch hole, angled slightly downward toward the outside for drainage. Check for obstructions first. Insert a PVC sleeve to protect the lines and wires.
Installing the Outdoor Unit
- Choose the Location: Place the condenser in a well-ventilated, shaded spot (the north or east side of a house is ideal) with clear airflow. Minimize the line set distance between units (though up to 50 feet is often possible).
- Provide a Stable Base: Set the unit on a level plastic condenser pad or secure it with a robust wall bracket. The unit must be perfectly level for proper operation.
- Ensure Proper Clearance: Follow the manufacturer’s manual for clearance requirements to ensure adequate airflow. Protect the unit from potential hazards like falling ice or snow.
Essential Steps for a DIY Ductless AC Installation
- Run the Line Set:
- Connect the refrigerant lines, communication wire, and condensate drain to the indoor unit.
- Bundle the insulated refrigerant lines, wire, and drain line (at the bottom) together with electrical tape.
- Carefully feed the bundled line set through the wall hole.
- Hang the indoor unit on its mounting bracket, feeding any excess line set outside.
- Install the Line Set Cover: Install a cover kit over the exterior lines to protect them from weather and UV damage, providing a clean, finished appearance.
Electrical and Refrigerant Line Connections for your Ductless AC Installation
This is the most critical part of the installation, requiring precision and a focus on safety.
- Connect Refrigerant Lines:
- For non-quick-connect lines, use a tubing cutter for a clean cut, deburr the end, and use a flaring tool to create a perfect flare.
- Apply a small amount of refrigerant oil to the flare connections.
- Use a torque wrench to tighten the flare nuts to the manufacturer’s exact specifications (e.g., a Cooper & Hunter model may require 11.8 ft/lbs for 1/4” tubing). This is essential to prevent leaks.
- Inspect lines for any kinks or sharp bends that could restrict flow.
- Electrical Wiring:
- Connect the communication wire (typically 14/4 stranded) between the indoor and outdoor units according to the wiring diagram.
- The outdoor unit needs a dedicated circuit (often 220V). We strongly recommend hiring a licensed electrician for this step to ensure safety and code compliance.
- An electrician will install a disconnect box near the outdoor unit for safe maintenance.
- Final Steps (Crucial for System Longevity):
- Vacuum the Lines: Use a vacuum pump and manifold gauge to pull a deep vacuum (500 microns, per EPA requirements) to remove all air and moisture.
- Leak Test: Perform a standing vacuum test for at least 10 minutes (an hour is better). If the micron level rises, you have a leak that must be found and fixed.
- Release Refrigerant: Once the vacuum holds, slowly open the service valves on the outdoor unit to release the refrigerant into the system.
- Seal and Finish: Seal the wall penetration on the exterior with sealant and complete the installation of the line set cover.
DIY vs. Pro: Pitfalls, Permits, and Professional Help
A DIY ductless ac installation can be rewarding, but it’s important to understand the potential pitfalls before you begin.
Common DIY Pitfalls
- Incorrect Sizing: An oversized unit wastes energy by short-cycling, while an undersized unit runs constantly without providing adequate comfort.
- Refrigerant Leaks: Improperly tightened flare connections are a common and costly mistake. A leak can damage the system and require expensive repairs.
- Electrical Mistakes: Working with 220V power is dangerous. Incorrect wiring can cause equipment failure, create a fire hazard, or lead to serious injury.
- Voiding Your Warranty: Many manufacturers require installation by a licensed HVAC contractor to honor the warranty. A DIY installation could leave you without coverage.
Special Considerations for Non-Traditional Spaces
Ductless systems are ideal for spaces where traditional HVAC is impractical, including:
- Garages and Workshops
- Sunrooms and Additions
- Older Homes without existing ductwork
We’ve helped many homeowners add comfort to these challenging spaces and specialize in Ductless Heater for New Homes and existing structures.
Benefits of a Professional Installation
- Proper Sizing: We perform precise load calculations to ensure your system is perfectly sized for your home, maximizing efficiency and comfort.
- Permits and Code Compliance: We handle all permitting and ensure your installation is safe, legal, and meets all local codes.
- Safety: Our licensed technicians are trained to handle high-voltage electricity and refrigerants safely.
- Warranty Protection: A professional installation ensures your manufacturer’s warranty remains valid, protecting your investment.
At Whirlwind Heating and Cooling, we do it right at a fair price. For homeowners in our area, we offer specialized Ductless Heater Woodburn OR services.
When to Call a Pro
Recognizing when you need professional help can save you time, money, and frustration. Call a pro if you’re facing:
- Complex electrical work (e.g., running a new 220V circuit).
- Refrigerant handling (which requires EPA 608 certification).
- Any step where you lack the specialized tools or feel uncertain.
Post-Installation: Maintenance and Maximizing Efficiency
Your ductless ac installation is complete, but proper care is key to long-term performance and efficiency. Regular maintenance will keep your system running smoothly for years.
Regular Maintenance Tasks
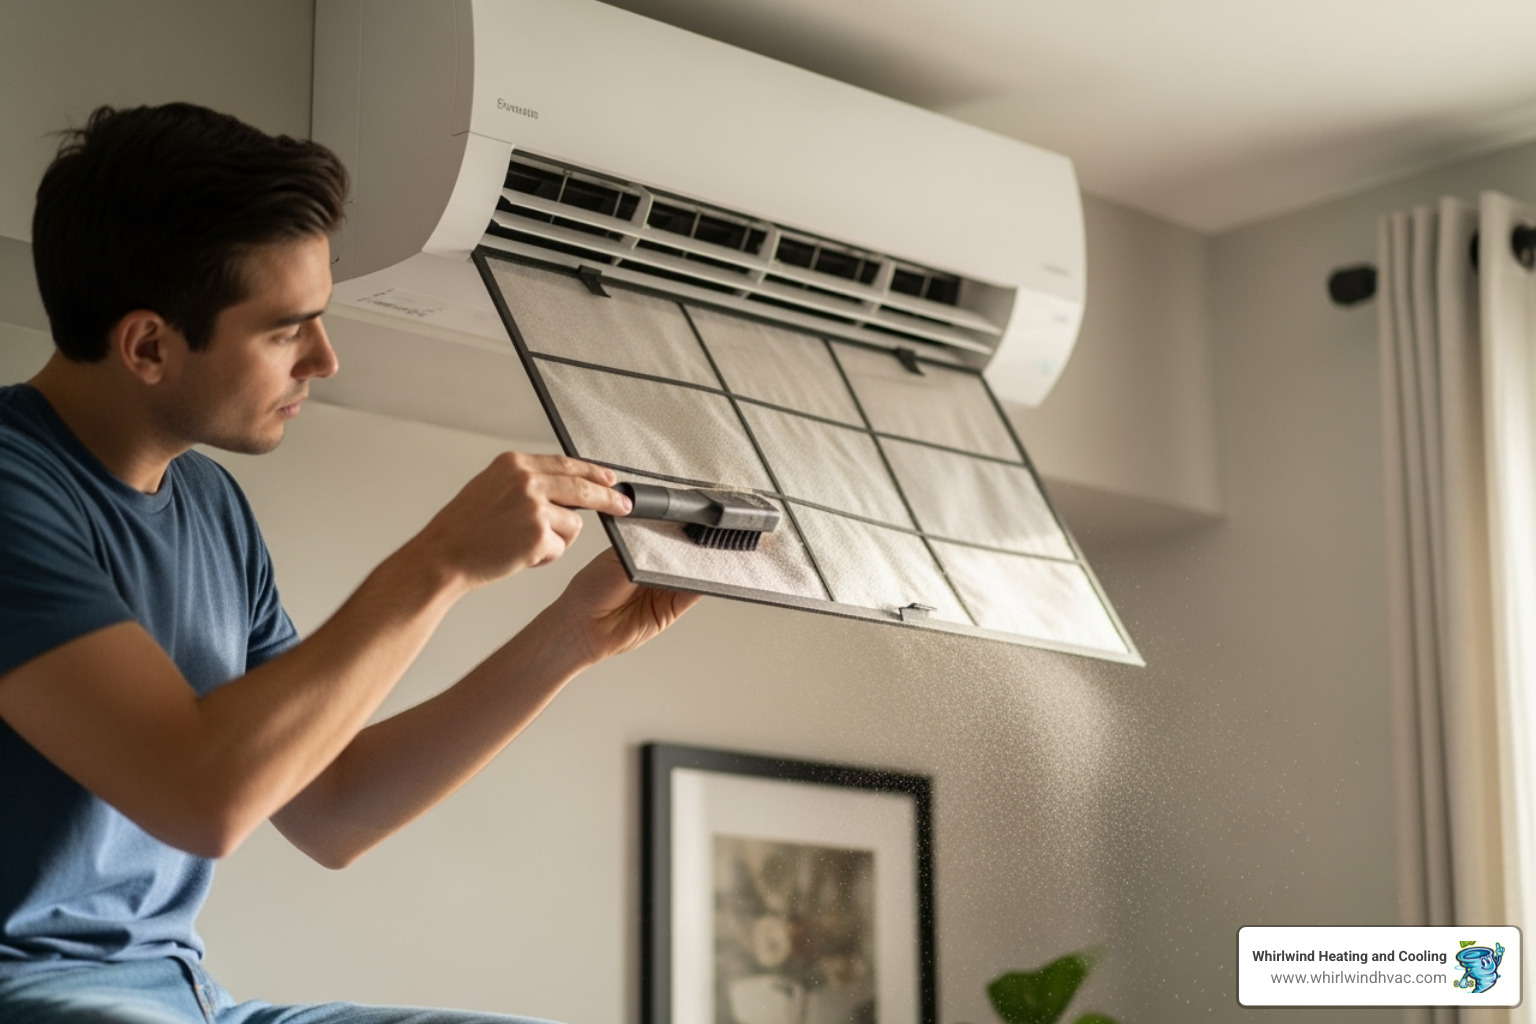
- Clean Filters Monthly: This is your most important task. Clogged filters restrict airflow and reduce efficiency. Most filters slide out and can be rinsed with water. Let them dry completely before reinstalling.
- Clean Coils Annually: Over time, dirt builds up on the indoor and outdoor coils, hindering performance. This is a job best left to a professional during an annual tune-up.
- Check the Drain Line: Periodically inspect the condensate drain line for clogs, which can cause water to leak from the indoor unit.
Maximizing Efficiency
- Use Programmable Settings: Take advantage of timers and schedules to automatically adjust the temperature when you’re away or asleep, saving energy.
- Leverage Zoning: Heat or cool only the rooms you’re using. This room-by-room control is a major benefit of ductless systems and can cut energy bills by 30% or more.
- Choose ENERGY STAR® Models: When buying a system, look for the ENERGY STAR® label. These products are independently certified for their energy performance. Learn more about certified products at Ductless Heating & Cooling on the ENERGY STAR website.
Troubleshooting Common Issues
- Not Cooling/Heating: The first thing to check is a dirty filter. If that’s not the issue, it could signal a refrigerant leak or sensor problem that requires a professional.
- Water Leaks: A leak from the indoor unit is almost always caused by a clogged condensate drain line. Address it quickly to prevent water damage.
- Strange Noises: While some air movement sound is normal, rattling, grinding, or buzzing can indicate a mechanical problem. Call for service if you hear unusual noises.
Frequently Asked Questions about Ductless Installation
We get many questions about ductless ac installation from homeowners in the Willamette Valley. Here are answers to the most common ones.
How long does a ductless AC installation take?
A DIY installation of a single-zone system typically takes a full weekend (1-2 days). A professional can usually complete the same job in 4-8 hours. Multi-zone systems may take a full day. The process is minimally invasive, requiring only a small hole through the wall, so there is no major disruption to your home.
Do I need a permit to install a ductless mini-split?
Yes, in most parts of the Willamette Valley, both electrical and mechanical permits are required. These regulations ensure your installation is safe and meets local building codes. When you work with a professional like Whirlwind Heating and Cooling, we handle all the necessary permitting as part of our service.
Can one outdoor unit cool my whole house?
It depends on the system. A single-zone system has one indoor unit connected to one outdoor unit, perfect for a single room. A multi-zone system connects a single, more powerful outdoor unit to up to 8 indoor units (or more). Each indoor unit can be controlled independently, allowing you to create different temperature zones throughout your home.
This provides excellent whole-home comfort and superior energy efficiency, making it an outstanding solution for homes without existing ductwork or for homeowners who want room-by-room temperature control.
Conclusion
Ductless ac installation is a powerful way to upgrade your home’s comfort. The benefits are clear: significant energy savings, personalized zoned comfort, and flexible installation that works for nearly any home.
Whether you choose a DIY approach or professional installation, you’re investing in a system that delivers efficient, reliable climate control. A DIY project can be rewarding, but remember to prioritize safety, especially with electrical work. Professional installation guarantees the job is done right, protects your warranty, and ensures compliance with all local codes.
Here in the Willamette Valley, we see how ductless systems transform homes, from historic houses in Salem to new additions in Woodburn.
For expert guidance, professional sizing, and installation you can trust throughout our region, we’d love to help you explore our Mini Splits Woodburn OR services. We believe in doing it right the first time, at a price that’s fair, and with the responsive communication you deserve.
Your comfort is worth getting right. Whether you’re ready to roll up your sleeves or prefer to leave it to the experts, you’re on the path to a more comfortable, efficient home.


